If there’s one thing that can immediately bring peace to my dinner table after a long day, it’s a big plate of juicy, perfectly seasoned Baked Chicken Breast that my husband and daughter will devour without a single complaint. Thanks to a quick brine and a hot oven, this recipe takes very little hands-on effort, turning basic chicken into an absolute weeknight victory. I use a simple spice mix made entirely from inexpensive pantry staples you probably already have in your cupboard, keeping the cost at around $1.94 per serving. This easy method is a quick win for tonight’s dinner and just as handy for meal prep over the next few days!
“Winner Winner delicious chicken dinner. I dislike chicken breast. Never ever eat it. There was a huge sale on it…so I got a huge package. I did the brine as directed, all the spices and WOW so delicious. The brine is a magic secret for sure.”
ARLENE
A Little Brining Goes a Long Way
Boneless chicken breasts are such a handy option for easy family dinners, but because they’re naturally lean, they can dry out pretty quickly in the oven. That’s where my quick brine comes in! I soak the chicken in lightly salted water for 30 minutes, which helps it hold onto moisture as it cooks and seasons the meat from the inside. And because the brine is already doing some of the seasoning, there’s no need to add extra salt to my spice rub. Instead, I use smoked paprika, garlic powder, onion powder, and black pepper for a deliciously savory, slightly smoky flavor that isn’t too spicy or overpowering. I also add a little sugar to the brine and rub for a touch of sweetness and to encourage browning, but both are completely optional!
Of course, keeping chicken juicy isn’t just about the brine. Those thick ends naturally take longer to cook, so I pound the breasts to an even thickness so everything cooks at the same rate. Then a HOT oven gives the outside color without overcooking the chicken. This baked chicken breast recipe is such a simple, cheap, beginner-friendly method, but you end up with beautifully tender, flavorful chicken that’s perfect for SO many meals! Working with bone-in, skin-on chicken? Try our oven roasted chicken breast recipe instead.
Recipe Success Tips
- Pound the chicken to an even thickness. Chicken breasts are naturally thicker at one end, which means the thinner parts can dry out before the center is fully cooked. To create a level playing field, I pound each breast until they’re about ½-¾ inch thick throughout. This helps ensure every square inch cooks at the exact same rate, leaving every bite juicy and perfectly cooked! (It also shortens cook time!)
- Don’t skip the quick brine! I soak the chicken breasts in a mild salt-and-sugar brine (2 Tbsp salt and 1 Tbsp sugar in 2 quarts of water), which does more than just season the meat. It actually alters the protein structure of the chicken! The salt helps dissolve parts of the tighter protein structure inside the muscle fibers, making the meat more tender and juicier when cooked (how’s that for some food science?!).
- Coating the chicken breasts with olive oil serves two purposes: it helps my dry rub (smoked paprika, garlic powder, onion powder, black pepper, and brown sugar) stick to the meat and encourages the Maillard reaction for a beautifully browned exterior. No soggy, pale chicken here, thank you!
- Bake at a high temperature! Lean, skinless chicken breast doesn’t have the same amount of high collagen and fat that say a skin-on chicken thigh does. This makes it prone to drying out when cooked at a low temperature for a longer period. For this reason, I DON’T use the “low and slow” method here! I prefer to bake it at a higher temperature of 425°F for about 20 minutes. This helps the outside develop some color as the chicken cooks through quickly, reducing oven time and helping prevent it from drying out.
- Check the temperature. Chicken breasts should reach 165°F internally before serving. I often remove them from the oven at 160°F (to avoid accidentally overcooking) and let carryover heat bring them to 165°F as they rest, checking with a meat thermometer before plating up.
- Give the chicken time to rest. Aside from bringing it to temperature, resting is also important for keeping the chicken juicy. As chicken cooks, it naturally tightens up, so giving it time to rest helps reduce how much moisture escapes when you cut into it. I rest the chicken for 5-10 minutes, loosely tented with foil, which allows those juices to settle (so less moisture escapes onto your cutting board when you slice it!)

How to Stretch this Recipe Even Further
Want to get more servings without spending more money? Try slicing your chicken breasts in half horizontally to make thinner cutlets! I love this trick for turning 4 large breasts into 8 smaller portions, which is a great way to stretch your grocery budget. Plus, thinner cutlets need less pounding and cook faster!
Here’s how I adapt this recipe to make more servings:
- Slice the chicken: Place each breast flat on a cutting board and carefully slice through the middle horizontally to make 2 cutlets. Gently pound any thicker areas until each cutlet is about ½ inch thick.
- Shorten the brine: Use the same brine ingredients, but refrigerate the thinner cutlets for about 15-20 minutes. Then drain, pat dry, and season as written in my recipe.
- Adjust the cooking time: Arrange the cutlets in a single layer in a rimmed baking sheet and bake at 425°F (I’d use 2 baking sheets, if needed!). Start checking after 10 minutes. They should take approximately 10-15 minutes, depending on thickness.
- Check for doneness: Use a meat thermometer to make sure each cutlet reaches 165°F in the thickest part, then rest for 5 minutes before serving.
You’ll get twice as many smaller portions from the same amount of chicken, perfect for serving with budget-friendly sides like rice, potatoes, or veggies. We use this trick in a LOT of our chicken breast recipes, like this creamy garlic chicken!
What to Serve with Baked Chicken Breasts
These baked chicken breasts go with sooo many sides, so it’s easy to turn them into a filling family dinner without spending much extra. For a cozy, comforting meal, I’d pair them with our buttery garlic herb mashed potatoes and some steamed green beans. The potatoes make 6 servings, making them a great, affordable way to stretch these already substantial chicken breasts even further. You can get the potatoes started while the chicken brines so everything is ready around the same time.
For something lighter, my family loves this juicy chicken with a scoop of rice and my air fryer broccoli. It makes 4 servings and cooks in just 6 minutes, so you can prep the florets while the chicken bakes and pop them in the air fryer as it rests. No fighting for oven space! A side salad is another great option, especially with a tangy vinaigrette to complement the smoky seasoning. And if you’re a family of dippers, try our creamy, sweet, and tangy honey mustard sauce for dipping! It takes a few minutes to make and adds a different flavor profile to your plate without changing the chicken seasoning itself.


Meal Prep it!
If there’s one protein that’s perfect for cooking ahead, it’s this baked chicken breast! The quick brine helps the chicken hold onto moisture as it cooks (and it stays juicy for long after it’s out the oven), and the mild, savory seasoning goes with just about anything. I just cook all four breasts at once, and then I’ve got a head start on lunches and dinners for the next few days for my family. Think salads, wraps, rice bowls, sandwiches, and whatever your heart desires.
Once cooked, let the chicken cool slightly, then refrigerate it in airtight containers with a little of the cooking juices to keep it moist. The chicken is delicious served cold or reheated, so you’ve got plenty of options. For a salad meal prep as I’ve shown below, let the chicken cool completely, slice it, and pack it on top of a simple salad with any dressing stored separately. Pop it in the fridge, and you’ve got a delicious, ready-to-eat lunch! If you prefer your chicken warm, keep it separate from anything you want to stay cold and crisp. Reheat it in the microwave, covered, with a splash of broth in short intervals until it reaches 165°F. Enjoy your batch-cooked chicken within 3-4 days.


Print
Add to Collection Go to Collections
Baked Chicken Breast Recipe
#wprm-recipe-user-rating-0 .wprm-rating-star.wprm-rating-star-full svg * { fill: #343434; }#wprm-recipe-user-rating-0 .wprm-rating-star.wprm-rating-star-33 svg * { fill: url(#wprm-recipe-user-rating-0-33); }#wprm-recipe-user-rating-0 .wprm-rating-star.wprm-rating-star-50 svg * { fill: url(#wprm-recipe-user-rating-0-50); }#wprm-recipe-user-rating-0 .wprm-rating-star.wprm-rating-star-66 svg * { fill: url(#wprm-recipe-user-rating-0-66); }linearGradient#wprm-recipe-user-rating-0-33 stop { stop-color: #343434; }linearGradient#wprm-recipe-user-rating-0-50 stop { stop-color: #343434; }linearGradient#wprm-recipe-user-rating-0-66 stop { stop-color: #343434; }
Equipment
-
9×13 Baking Dish
-
Meat Thermometer
Ingredients
Brine Ingredients
- 4 chicken breasts boneless, skinless (approx. 8 oz each) $7.14*
- 2 Tbsp Kosher salt $0.06
- 1 Tbsp granulated sugar optional, (can omit for keto/low-carb) $0.02**
- 8 cups cold water $0.00
Dry Rub Ingredients
- 2 tsp smoked paprika or sweet paprika, $0.21
- 1½ tsp garlic powder $0.05
- 1 tsp onion powder $0.03
- ½ tsp black pepper freshly cracked, $0.05
- ½ tsp brown sugar optional (omit for sugar-free/keto) $0.01**
- 1 Tbsp olive oil $0.18
Instructions
-
Gather ingredients.
-
Place the chicken breasts between sheets of plastic wrap or put them inside a gallon-size baggie. Use a meat mallet or rolling pin to pound the thicker ends until each breast is an even ½- to ¾-inch thickness throughout.
-
In a large bowl, add the pounded chicken, 2 quarts of cold water, 2 Tbsp kosher salt, and 1 Tbsp granulated sugar. You can also brine the chicken breasts in a Gallon size (maybe 2) zip-top bag.
-
Cover and refrigerate the submerged chicken breasts in the brine for 30 minutes. Do not exceed 45 minutes to prevent the meat texture from breaking down.
-
Preheat your oven to 425°F. In a small bowl, combine the smoked paprika, garlic powder, onion powder, black pepper, and brown sugar (if using).
-
Remove chicken from the brine, rinse quickly under cold water, and thoroughly pat completely dry with clean paper towels.*** Drizzle the breasts with olive oil, then rub the spice mix evenly over all sides of the chicken.
-
Arrange seasoned chicken breasts in a single layer in a 9×13-inch baking dish or rimmed baking sheet. Bake uncovered at 425°F for 18-20 minutes, or until an instant-read thermometer registers 160-165°F in the thickest part of each chicken breast.
-
Transfer chicken to a cutting board or plate, loosely tent with aluminum foil, and let rest for 5-10 minutes before cutting. The residual heat will finish bringing the internal temperature to 165°F while locking in all the juices. (see notes)
See how we calculate recipe costs here.
Notes
**I add a little granulated sugar to the brine to balance the saltiness, and the brown sugar in the spice rub adds a hint of sweetness and helps the chicken brown in the oven. Both are optional! Feel free to leave them out for a sugar-free or keto-friendly version.
***After brining, give the chicken a quick, gentle rinse under cold water to wash away any excess salty liquid on the surface. Then pat it thoroughly dry with paper towels before seasoning. Keep the water pressure low to minimize splashing, and clean and sanitize your sink and surrounding surfaces afterward.
Internal temperature: You can remove the chicken from the oven once it reaches an internal temperature between 160-165°F. I like to then cover the chicken with aluminum foil so it stays warm. The chicken will naturally continue to cook while it’s resting. Just make sure it reaches the final internal temperature of 165°F before serving.
If you only have table salt: Fine table salt is roughly twice as dense as kosher salt because its tiny, uniform cubes pack tightly together. Using table salt at a 1:1 ratio will double the salt concentration and ruin the texture (and flavor) of your chicken breasts. If all you have is table salt, cut the volume in half:
- My recipe calls for: 2 Tbsp Kosher salt
- Table salt substitute: 1 Tbsp table salt
Note: Table salt takes a bit longer to dissolve in cold liquid, so whisk it into a cup of warm water until fully dissolved, then stir in the remaining cold water before adding your chicken.
Want to use your air fryer? Try our air fryer chicken breast instead! That method skips the brine because the chicken cooks so quickly (meaning there’s less time for it to dry out), but still turns out juicy and tender. It cooks at 400°F for about 13 minutes, flipping halfway through, or until the thickest part reaches 165°F. Perfect when you’re short on time!
Nutrition
how to make Baked Chicken Breasts step-by-step photos

Gather the ingredients for the chicken brine: You’ll need 4 boneless, skinless chicken breasts (approx. 2 lbs total / 8 oz each), 2 Tbsp kosher salt, 1 Tbsp granulated sugar (optional), and 8 cups (2 quarts) cold water.

Gather the ingredients for the seasoning mix: You’ll need 2 tsp smoked paprika, 1½ tsp garlic powder, 1 tsp onion powder, ½ tsp freshly cracked black pepper, ½ tsp brown sugar, and 1 Tbsp olive oil.

Pound the chicken breasts: Place 4 boneless, skinless chicken breasts between sheets of plastic wrap or inside a large zip-top bag. Use the flat side of a meat mallet or a rolling pin to gently pound the thicker ends until each breast is an even ½-¾ inch thick throughout. I recommend working from the thickest part outward and using gentle, steady taps so you don’t tear the meat. The goal is an even thickness, not paper-thin chicken!

Prepare the brine: Add 8 cups (2 quarts) cold water, 2 Tbsp kosher salt, and 1 Tbsp granulated sugar (if using), and the flattened chicken breasts to a large bowl. Make sure they’re completely submerged in the liquid. You can also divide the chicken and brine between one or two gallon-size zip-top bags if that’s easier.

Brine the chicken: Cover the bowl (or seal the bags) and refrigerate for 30 minutes. This gives the salt time to work on the meat’s proteins, helping the chicken retain moisture as it cooks. Don’t let the chicken brine for longer than 45 minutes; otherwise, it might get a little mushy.
Preheat your oven to 425°F. In a small bowl, combine 2 tsp smoked paprika (or sweet paprika), 1½ tsp garlic powder, 1 tsp onion powder, ½ tsp freshly cracked black pepper, and ½ tsp brown sugar (if using). Stir until everything is evenly mixed and there are no clumps of brown sugar.

Dry and season the chicken: Remove the chicken from the brine and discard the liquid. Give the breasts a quick, gentle rinse under cold running water to remove excess brine from the surface, keeping the water pressure low to avoid splashing. Pat the chicken thoroughly dry with clean paper towels. You don’t want excess water sitting on the surface, as that can prevent the chicken from browning nicely.

Drizzle with 1 Tbsp olive oil, then rub the spice mixture evenly over both sides of each breast. I like to season the edges, too, so there aren’t any bare patches.

Bake the chicken breasts: Arrange the seasoned chicken in a single layer in a 9×13-inch baking dish or on a rimmed baking sheet. Bake uncovered at 425°F for approximately 18-20 minutes, or until it reaches 160-165°F in the thickest part. The outside should look lightly browned, with the paprika giving the chicken a deeper reddish-golden color. I recommend checking the temperature toward the earlier end of the cooking time, especially if your breasts are closer to ½ inch thick.

Rest, slice, and serve: Transfer the cooked chicken breasts to a clean cutting board or plate and loosely tent them with aluminum foil. Let them rest for 5-10 minutes before slicing. The residual heat will bring the internal temperature to 165°F while locking in the juices. The finished breasts should have a lightly browned, well-seasoned exterior and a tender, juicy interior. Slice against the grain and serve with your favorite sides, or let the chicken cool before storing it for meal prep. Enjoy!

Baked Chicken Breast Seasoning Variations
One of my favorite things about this baked chicken breast recipe is how easy it is to change up the flavors! Here are a few ideas:
- Leave out the sugar: If you’re watching your sugar intake, you can skip the granulated sugar in the brine and the brown sugar in the rub. Neither is essential for keeping the chicken juicy! You’ll get a more savory finish, although the outside may not develop quite as much color without the brown sugar.
- Change up the seasoning: Try lemon pepper for a bright, citrusy flavor, Cajun seasoning for a spicy kick, or our poultry seasoning blend for a more herby flavor. I recommend choosing a salt-free mix when possible, as the brine already seasons the chicken. Store-bought blends often contain added salt, which can make the finished chicken too salty.
- Turn up the heat! I keep the original rub mild so it works for the whole family, but you can add ¼-½ tsp cayenne pepper if you like things spicy. Start with ¼ tsp for a gentle kick, then increase it if you prefer more heat.
- Swap the paprika. Smoked paprika is my go-to because my family loves its warm, smoky flavor! If that’s not your thing, sweet paprika gives the chicken a milder flavor without losing that lovely paprika color.
Storage & Reheating
Let the chicken cool slightly, then transfer it to an airtight container with any collected cooking juices to help keep it moist. Refrigerate within 2 hours of cooking and store for up to 3-4 days.
Reheating
My preferred method is to place the chicken in a baking dish with a splash of broth, cover it with foil, and warm it in a 350°F oven until heated through to 165°F. The broth and foil help prevent the chicken from drying out. You can also microwave individual portions with a splash of broth, covered, in short intervals. Chicken breast can become dry and rubbery if reheated repeatedly, so I recommend only warming what you plan to eat!
Freezing
You can freeze the baked chicken whole or sliced, but I recommend keeping it whole for the best texture. Wrap it tightly and place it in a freezer-safe bag or container for up to 3 months. Thaw overnight in the refrigerator before reheating.

Try These Baked Chicken Recipes Next:
- Keep these Baked Chicken Drumsticks on repeat because the seasoning is simple but packed with flavor.
- These Baked Chicken Wings prove you can get crispy skin straight from the oven!
- Want to make dinner and your sides at the same time? Then I think you’ll love this Roasted Chicken and Vegetables, with potatoes, carrots, onions, and chicken thighs all in one casserole dish.
More Chicken Breast Recipes
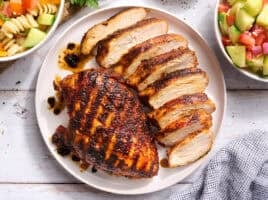
Grilled Chicken
$5.13 recipe / $1.28 serving
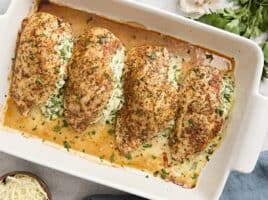
Spinach Stuffed Chicken Breast
$14.18 recipe / $3.55 serving

Marry Me Chicken
$12.35 recipe / $3.08 serving

Bruschetta Chicken
$5.93 serving / $1.48 recipe
Our Baked Chicken Breast recipe was originally published 1/4/25. It was retested, reworked, and republished to be better than ever 10/14/26.
The post Baked Chicken Breast appeared first on Budget Bytes.
PakarPBN
A Private Blog Network (PBN) is a collection of websites that are controlled by a single individual or organization and used primarily to build backlinks to a “money site” in order to influence its ranking in search engines such as Google. The core idea behind a PBN is based on the importance of backlinks in Google’s ranking algorithm. Since Google views backlinks as signals of authority and trust, some website owners attempt to artificially create these signals through a controlled network of sites.
In a typical PBN setup, the owner acquires expired or aged domains that already have existing authority, backlinks, and history. These domains are rebuilt with new content and hosted separately, often using different IP addresses, hosting providers, themes, and ownership details to make them appear unrelated. Within the content published on these sites, links are strategically placed that point to the main website the owner wants to rank higher. By doing this, the owner attempts to pass link equity (also known as “link juice”) from the PBN sites to the target website.
The purpose of a PBN is to give the impression that the target website is naturally earning links from multiple independent sources. If done effectively, this can temporarily improve keyword rankings, increase organic visibility, and drive more traffic from search results.